Materials for Teachers and Parents
Photography Basics for Educators
Introduction
First, it should be clarified that photography does not consist solely of technical knowledge and the skill of handling the camera. Photography is much more than just pressing the shutter button at the right time, as it involves many psychophysical functions, such as moving in space, observing motives, perceiving relationships between objects, planning and deciding on shots and settings, meaningfully connecting inner experience with the outside world, self-expression, creation, and so forth. Moreover, pressing the shutter button does not necessarily mean completion of the photographic creation. The latter can continue with collecting, sorting and storing of photographs, creative processing with the help of software tools, reflection and conversation, publication or exhibition.
The present manual is intended for educators and parents to get acquainted with the basic photographic elements that will help them work with children. We do not have to be photographic experts or great artists to bring children closer to the world of photographic creation. We only need the basic knowledge of the tools and accessories that we use (camera, computer, photo-editing and processing program), knowledge of art composition and laws of expression. It should be noted that this is a basic presentation, and its content is structured with regard to areas that can also be found in more extensive books. This means that those with less knowledge may encounter quite a few unfamiliar concepts, whereas those more knowledgeable are likely to wish for more in-depth content. We advise everyone to look for additional material on the bookshelves or on the Internet, if necessary.
In educational work, we advise that the children acquire new skills and knowledge gradually and in accordance with their psychomotor and cognitive development. Spontaneity, games, fun and experimentation should remain the basis for doing photography in this early life period.
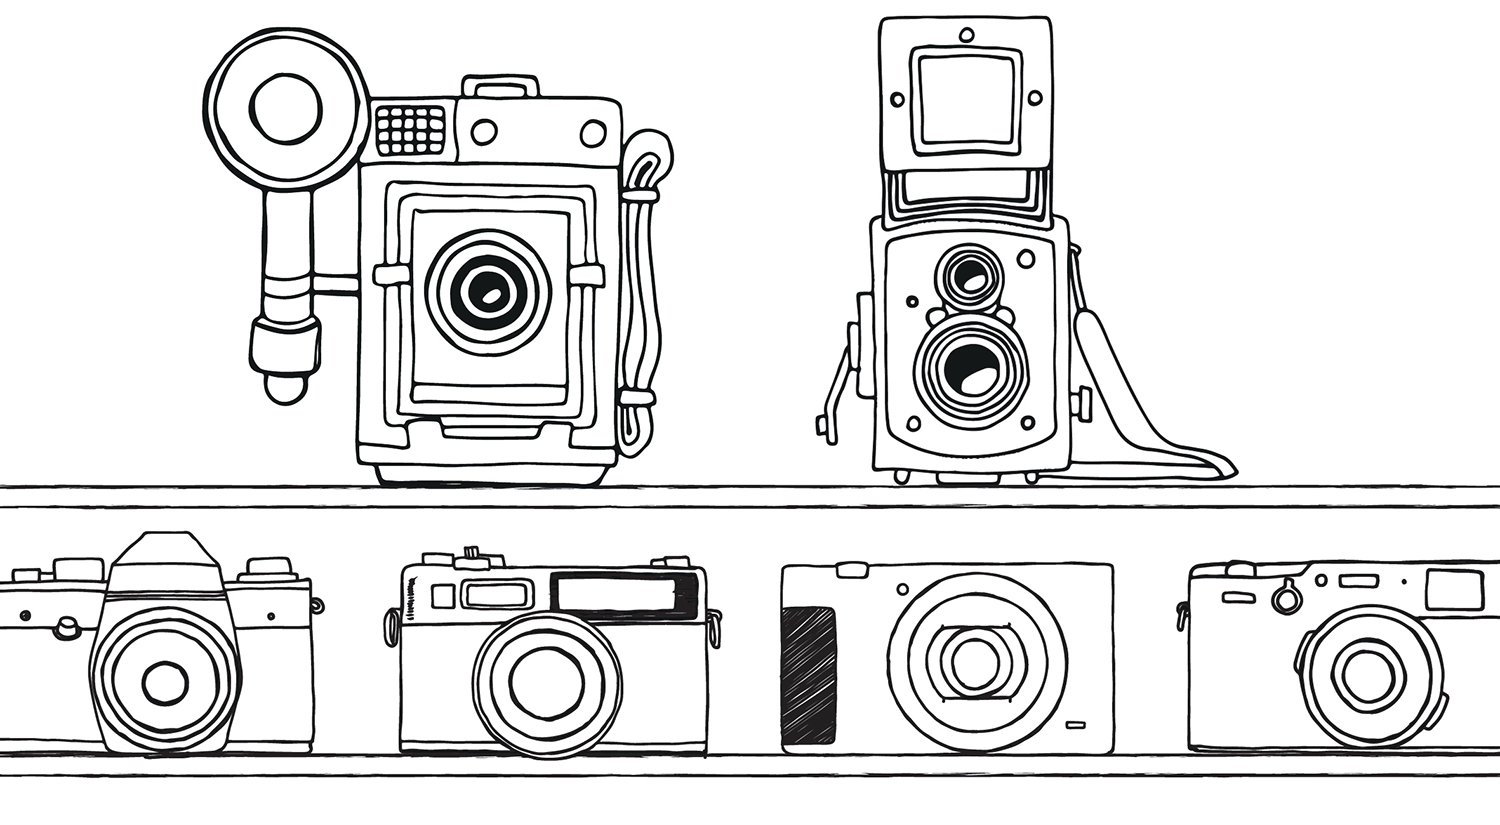
Types of cameras
The word "photography" comes from the Greek and literally means "drawing with light". The first photograph taken by a camera dates back to 1827. Although the basic principles of photography knew little change, the way of storing images has changed significantly over time. In particular, the invention of digital technologies (digital camera, computer, internet, social networks) has simplified photography in a dramatic way, making it cheaper and bringing it closer to mass use.
A digital camera can be described as a device that:
- intercepts light through the lens
- detects light on the light sensor
- analyzes and processes light data with an electronic processor
- stores data on a storage medium
- converts data to an image displayed on the screen.
We differentiate cameras based on the following key characteristics:
- Light sensor size and number of sensor points (pixels)
- Possibility of automatic, semi-automatic or manual settings
- Lens type and interchangeability
- Focus and save image speed
- Ability to record videos
We divide cameras roughly into three classes:
- Mobile cameras (mobile phones)
- Compact cameras (smaller in size, affordable, easy to handle – “aim-and-shoot” principle, large automatic programs, zoom objective lens without the possibility of replacement)
- Single-lens reflex cameras – DSLR (more costly, powerful, possibility of manual settings, possibility of changing targets)
- Mirrorless cameras – CSC (similar in performance to SLR’s, but smaller and easier to use)
Which camera is the best?
There is no such thing as an objectively optimal camera, as the purposes of use, needs and desires depend on each user’s preferences. For children, however, the safest choice seems to be the compact camera. Mobile phones are somewhat less suitable or should be used with caution and in accordance with professional recommendations. SLR cameras are generally too demanding for children, but can be a suitable tool for learning, documenting activities or for specific photo projects.
The appropriate size of the appliance, the durability of the housing, the camera fitting well in the hand, accessible keys and transparent menus of the interface should all play an important role in the choice. Technical specifications, such as a large number of megapixels or a large zoom, are not the most important; moreover many cameras from a lower price range offer satisfactory quality.
Camera structure
The following are the most important parts of any given camera:
- Casing
The size of the camera, the way it is held in the hand and the quality of protection against external influences depend on the housing. - Shutter button
Using a finger-activated trigger, the shutter (a rectangular opening with movable curtains) opens in the camera, which determines how long the light will enter the camera, depending on the duration of the opening. - Objective lens
The objective uses its lens to collect and project light onto the sensor. The width of the image capture angle and the possibility of optical zoom (wide-angle and telephoto lenses) depend on the type of lens. Lenses that permit us to change the angle of view and the optical zoom are called zoom lenses. An essential part located in the lens is the aperture (a circle-shaped aperture), which according to its diameter determines how much light will enter the camera. - Light sensor
The sensor consists of a multitude of sensors arranged in a network (pixels) that detect the intensity and color quality of light. Electronically adjusting the sensitivity of the sensor (ISO) determines the higher or lower brightness of the image. - Buttons determining the photography modes
- Automatic mode (green button)
The camera automatically controls the shooting settings according to the conditions. - Scenery modes
The camera adjusts the settings according to the subject or situation (portrait, night shots, close-ups, fast-moving subject…) - Manual mode
The photographer chooses the shooting parameters (aperture, shutter speed…) either completely on their own or partially assisted by the camera.
- Automatic mode (green button)
- Memory medium
A digital photographic record is stored on the storage medium for later viewing, printing or processing. In addition to the internal memory, the camera also has a memory card slot that allows for storing large amounts of data. Digital light data is converted and stored in an image format called JPG. - LCD screen
The LCD screen allows you to view images and pre-made shots, change settings and operate the camera. - Power unit
Ordinary or rechargeable batteries can provide electricity. - Flash attachment
The flash function permits you to take photos of poorly-lit subjects that are not too far away from the camera.
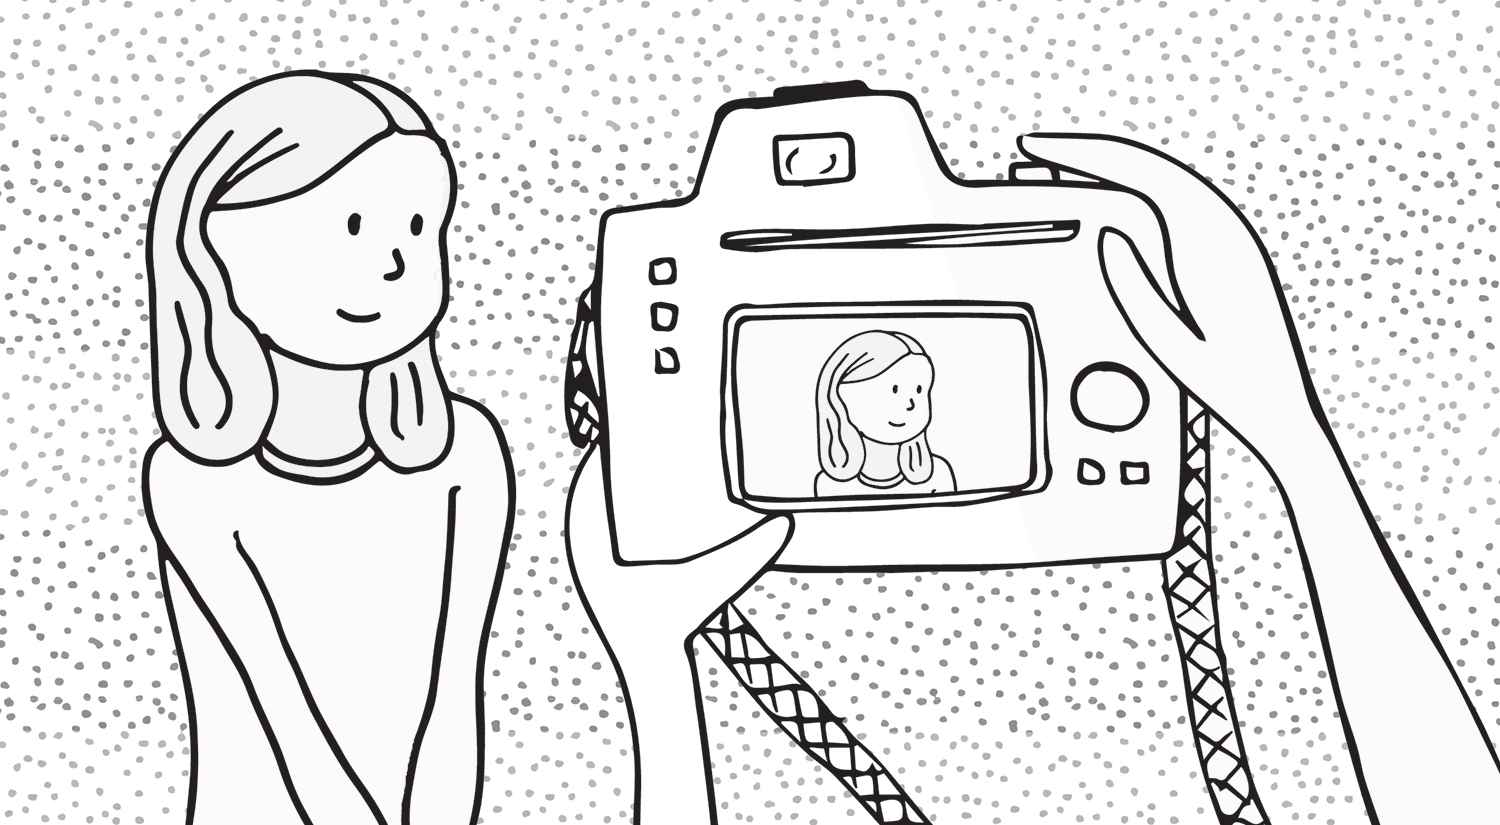
First steps in photography
The use of the camera by a child should be adapted to their age and physical/psychosocial development. The child’s first practical experience should be gained gradually and playfully in a safe environment ensured by the educator. After appropriately acquainting the child with the operation of the camera, he or she should also get to know the basic camera components, the most important being:
- On/off button
- Trigger
- Photo preview button
It is preferable to equip the camera used by children with a hand strap. We help the children get used to immediately placing the strap around their wrists, and thus prevent the camera falling from their hands. In the beginning of an activity, we can always remind them of this safety measure with a sentence, such as "Hand through the strap".
Fingers often sneak up on children's photos, so it's a good idea to warn children not to keep their fingers on the lens upon their first encounter with the camera.
Preparation of photographic projects for children
By visiting our page eduskills.plus, you will find various photographic projects that are suitable for implementation in kindergartens and schools. However, you can also prepare photographic activities by yourself and link them with most of the thematic activities that take place in school and kindergarten. When choosing an activity on our webpage or when preparing your own photographic projects, we recommend you to consider the following elements:
Preparation:
We determine how we will implement the project and what results we should expect. If necessary, we prepare sample photographs or other materials to properly illustrate a given topic. We should not overdo it with sample photos, as that may influence the children’s creative imagination too much and thus hamper their original expression.
Implementation:
In the beginning, it is preferable to choose projects that gradually acquaint children with the operation of the camera. For starters, especially suitable are activities where children look at photos and describe what’s on them. It is also a good idea to acquaint children more closely with the camera, and for easier understanding we can use a comparison with the human body - the lens can be compared with the human eye, and the trigger with the eyelid, because when opened it lets light into the eye (a picture is displayed).
In their first photographic steps, children should have as much freedom as possible to explore, whereas the subject itself should be of secondary importance. You can encourage the children to play with the distance to the object, perspective and photography according to the light source and the like. Once you see that children are already sovereign in handling the camera, you can move on to activities where photography serves as a tool for creatively addressing a particular topic. At any rate, the joy of creative engagement and expression in photography should always come first.
Working in pairs and groups: We assign one camera to a couple or a small number of children who then take turns taking photographs. Those not equipped with the camera at a given moment can pose for a photograph or assist the photographer in some other way. If necessary, we determine the time period after which the children change roles.
Independent work: We distribute cameras to one group of children, while the other children are employed with a different activity - it can be an activity related to a specific topic or just free play.
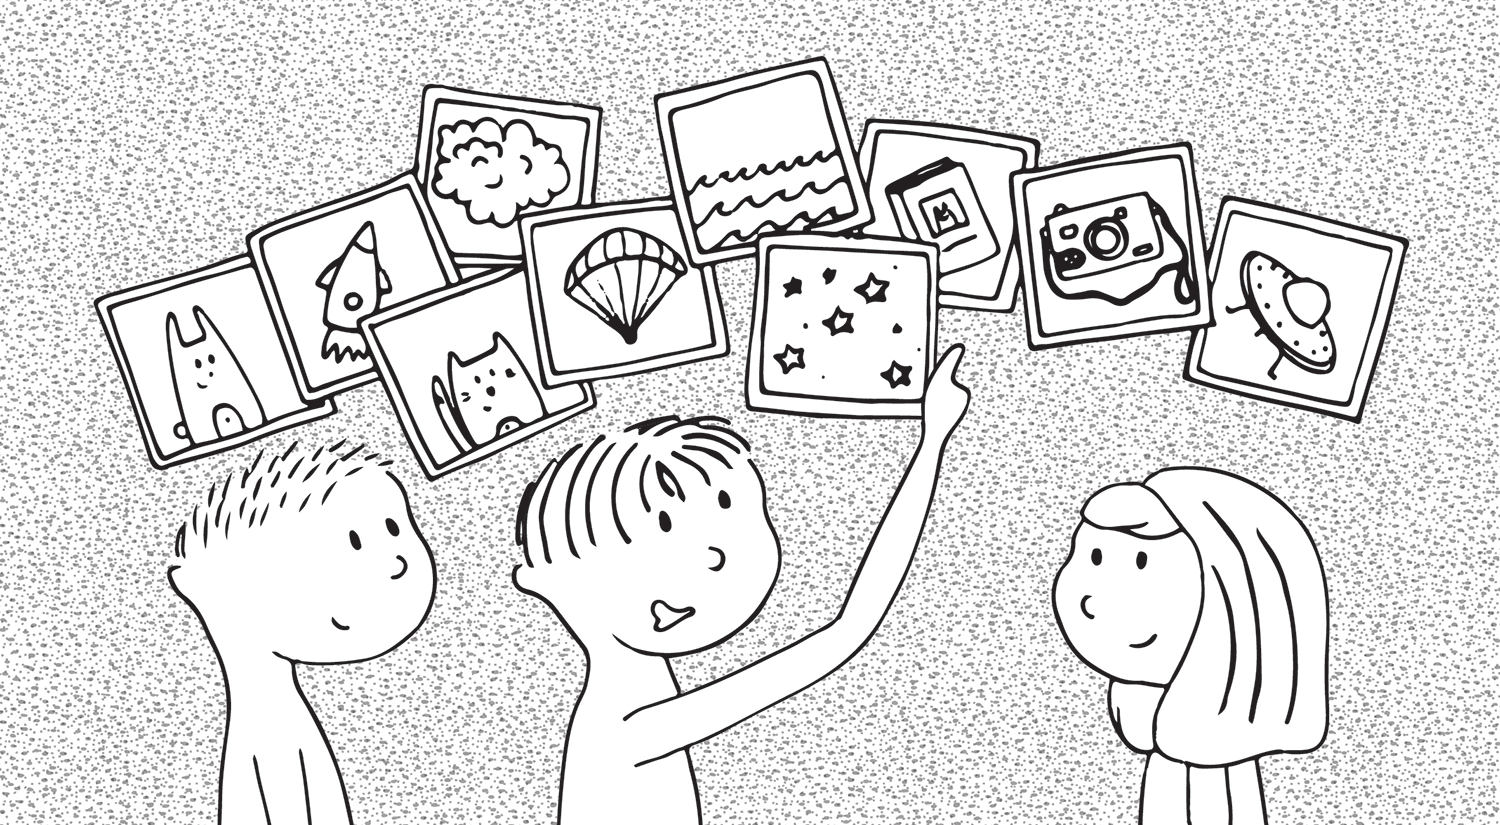
Reflection:
Once the children have taken the photos, processed them and saved them on a computer, it is advisable to reflect on the activity in a group. Encourage the children to talk about their experiences, what they liked and what might have caused them problems. These reflections are to be recorded, so as to more easily prepare future activities tailored to the group. Your conversation with the children is also a good opportunity to analyze the photos taken, in the sense that it allows you to reflect on the effect of certain approaches: framing, lighting, choice of subjects, etc.
Through reflection, the children consolidate the acquired knowledge about new photographic approaches as well as about the topic provided. A joint conversation can be a source of new ideas, and can round off the activity in a meaningful way.
Photography basics
Photography is much more than objectively "mapping" and documenting tangible reality. Each photograph is unique and also a reflection of the photographer’s emotions and thinking process. With its artistic elements, photography also evokes unique internal responses on the part of the viewer.
For a child, photography should above all be a playful activity allowing for free expression. The child usually quickly, spontaneously and intuitively masters the photographic medium, as non-verbal / visual communication is often closer to them than the verbal one. Although there are rules in photography, when evaluating a child's creativity, we prefer to avoid evaluations based on right and wrong. Instead, we rather listen to what the child wants to tell us.
In photography, we know and pay attention to the following areas when working with a child:
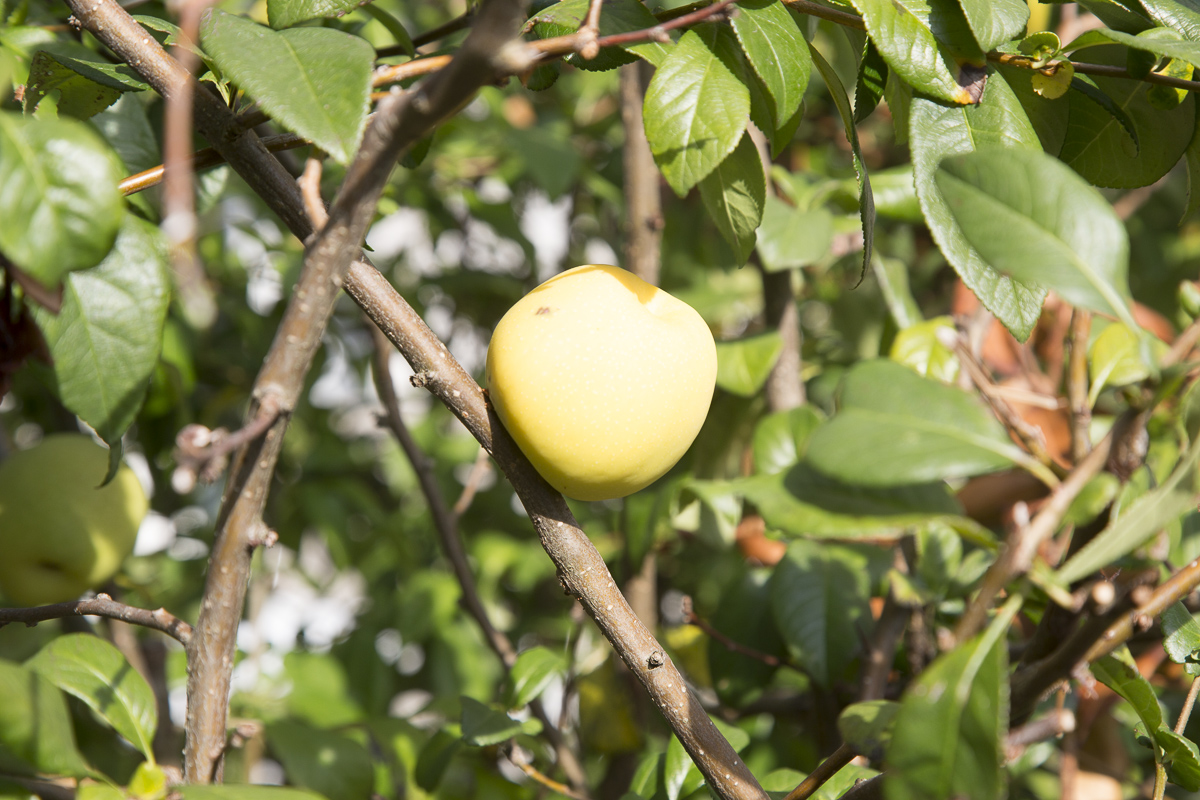
- Sharpening
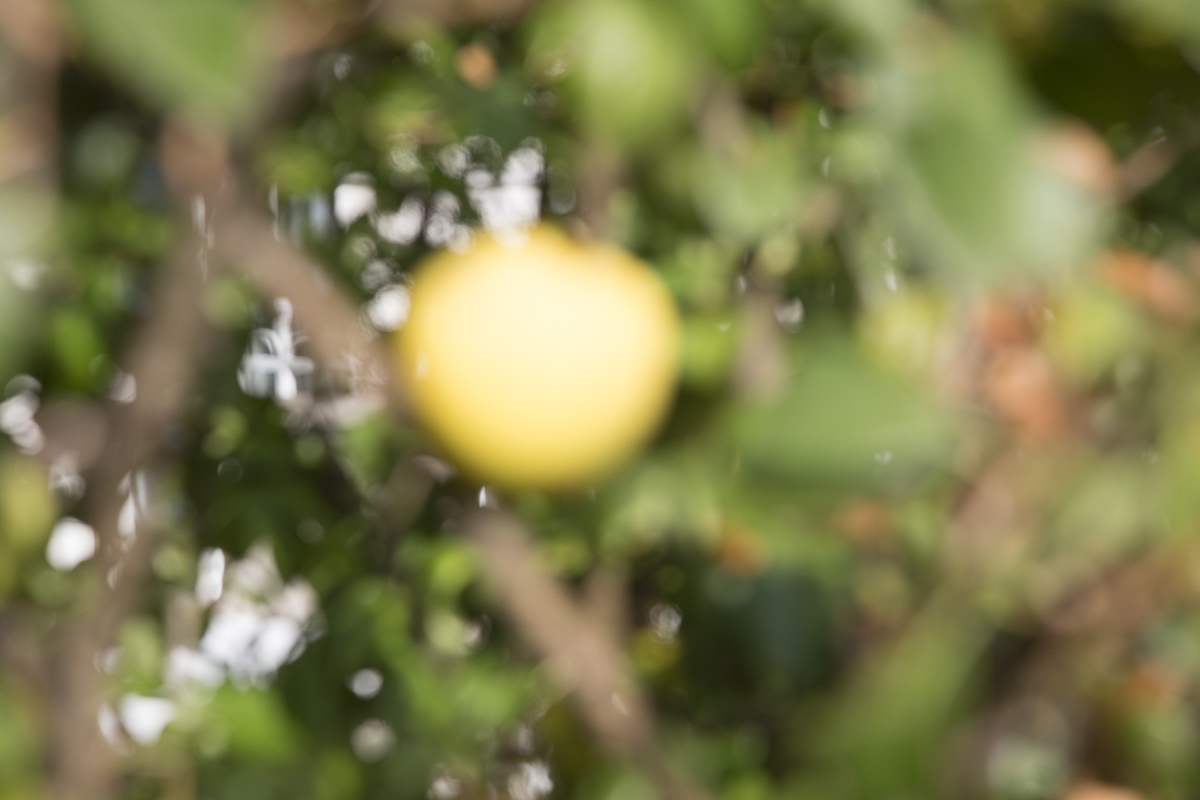
We normally want the object we intend to show or expose in a photograph to be the sharpest part of the image. This is achieved by positioning the camera in your hand in a way that the focus point, represented by a small square on the screen or in the camera's viewfinder, falls exactly on the selected object. When you press the shutter button halfway, the camera automatically focuses on the subject, which we usually hear as a short beep or see the square change color. When the focus is successful, you can press the shutter button all the way down.
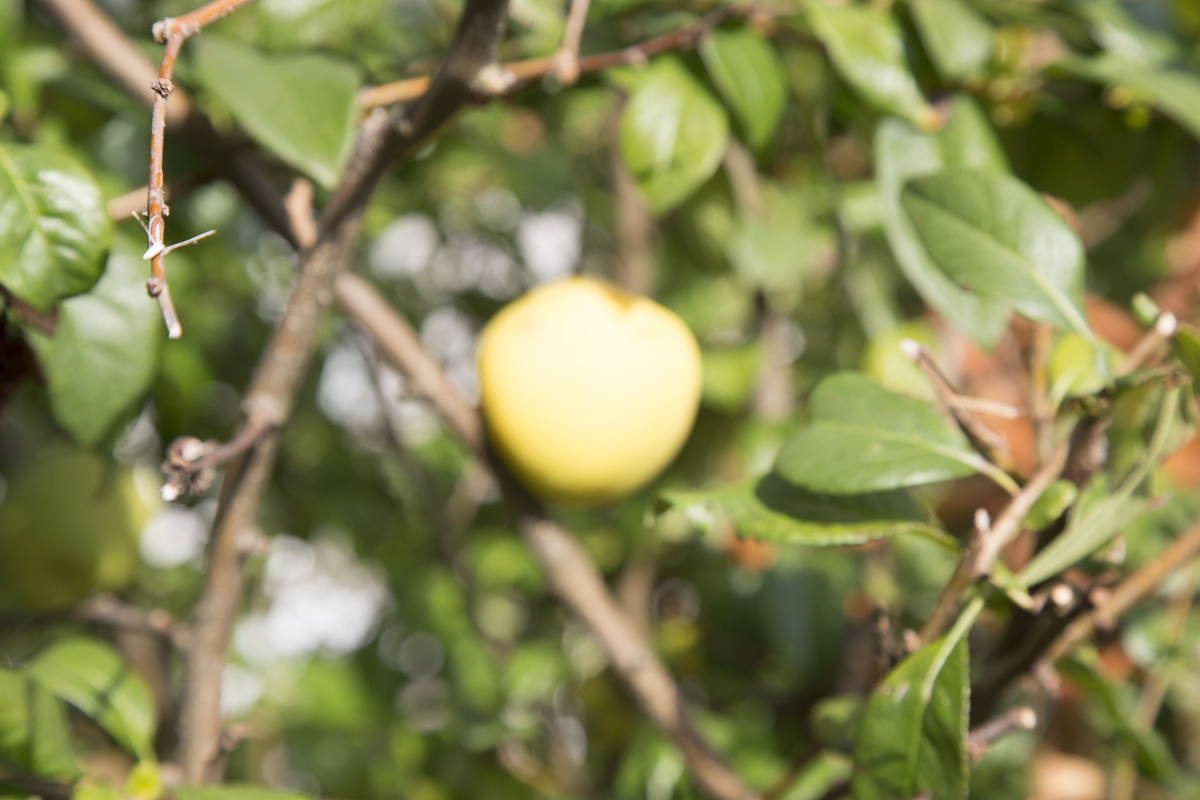
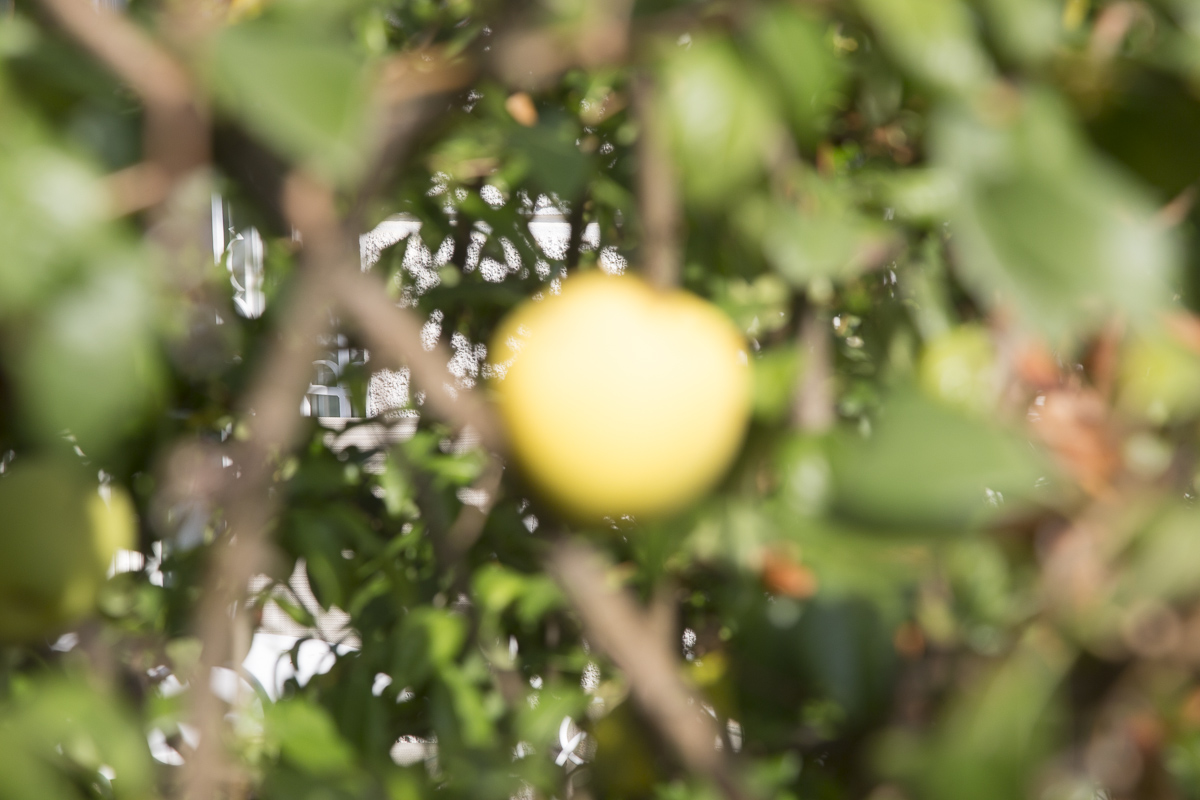
In photography, you will notice that objects that are farther or closer than the focused one are less sharp in the image or more or less "blurred" (depth of field).
If you want an image composition in which the focused subject is not exactly in the center of the image, hold the camera left – right or up – down while holding the shutter button halfway (locked autofocus) to get the appropriate composition. When we are satisfied with it, we press the button to the end.
In order for the sharpness in the photo to be good, it is important to have a stable posture when pressing the shutter button and to keep the camera in your hand as still as possible. This is made more difficult at longer shutter speeds, which are set in low light. As a result, the photo is more likely to be blurred or "shaken".
For children, holding the camera steadily and pressing the shutter button at the same time can be quite a challenging task. We explain to the children and practice with them how they can hold the camera in their hand as calmly as possible and how they can stabilize their posture with slightly extended legs. If possible, the children can also help with stabilization by resting their body, hands or camera on a stable object nearby (tree, wall, bench…).

- Lighting
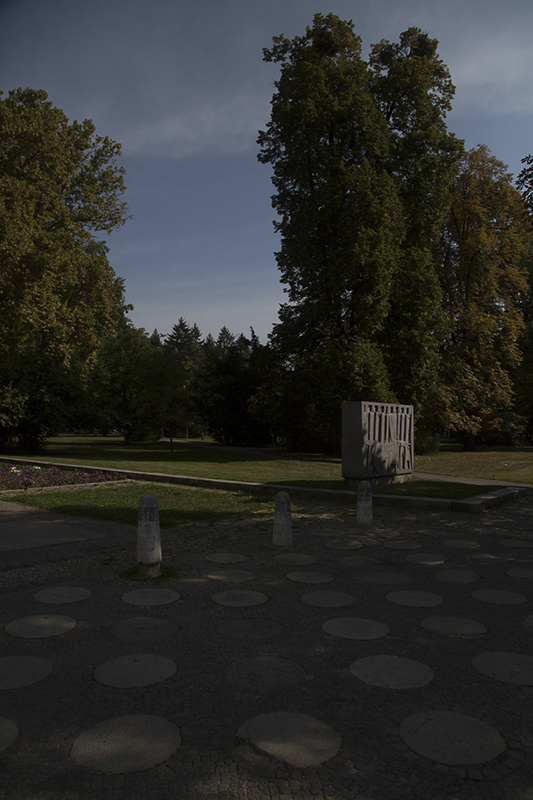
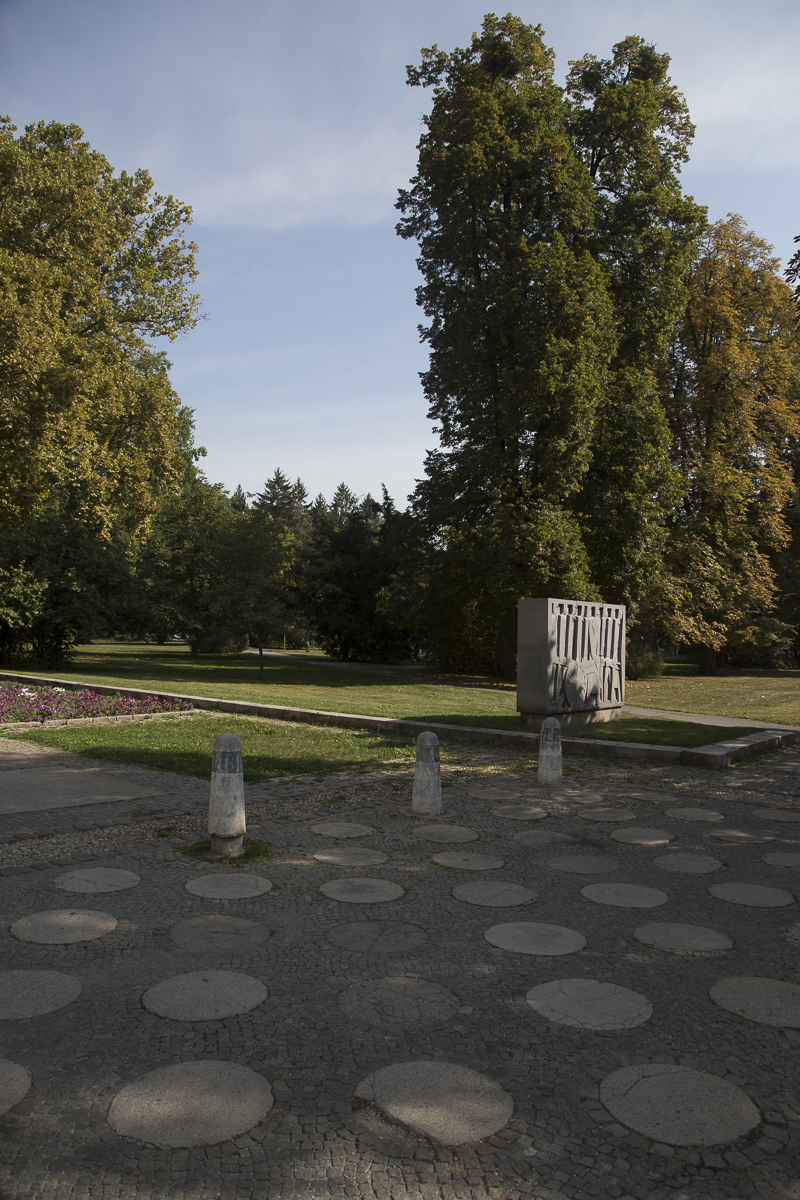
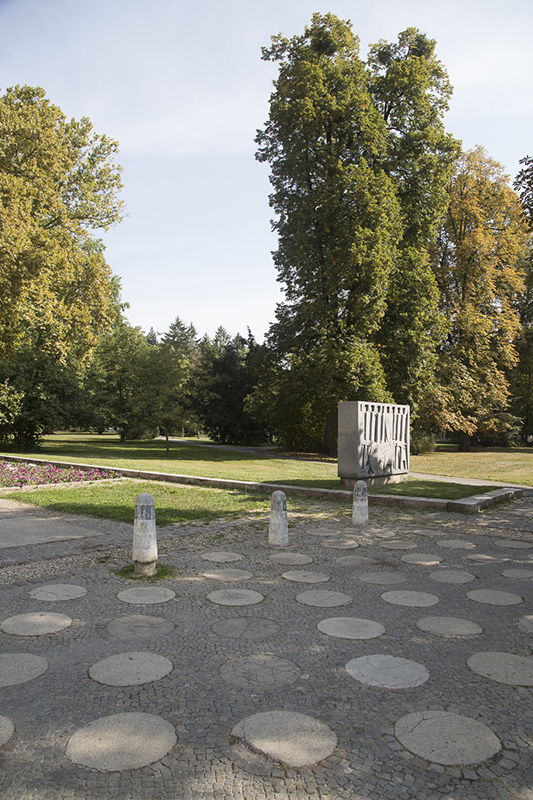
We expect of any photograph to be adequately lit, not too dark or too bright, also when it comes to its individual parts.
Appropriate lighting is ensured by the camera's built-in light meter, and the settings of three main elements also play an important role: lighting speed or shutter speed (usually expressed in thousandths, hundredths and tenths of a second, but can last longer), aperture size (f- value) and the sensitivity of the ISO light sensor. All these elements are interconnected. The more the aperture is open, the shorter the shutter speed and vice versa. Increasing the ISO value can also shorten the shutter speed, but in this case, graininess or noise may appear in the image.
The brightness of the photograph is of course also influenced by the intensity of the light (day - night, sunny - cloudy, outside - inside…) and the light source (front, back, side…). If the surfaces captured by photography are illuminated with a very large light range, it may happen that parts of the photograph are completely dark or completely bright – "burnt".
- Composition
The composition of a photograph tells us how the motifs (figures, objects, background, etc.) are arranged on the surface or how they make up the whole photograph and in what relationship they are with each other. Motifs can form or combine into various artistic elements such as points, curves, diagonals, triangles, circles, patterns, textures, etc.
Us humans being distinctly visual beings, the perception of space and a sense of artistic composition begins to develop at an early age. Therefore, even children or complete laymen, equipped only with basic intuition, can be able to describe a composition as, for example: likeable or unpleasant, orderly or unordered, balanced or unbalanced, static or dynamic, empty or full, soft or solid…
The main factor determining the composition of a photograph is framing. By observing and moving around the space, we first choose the main motif, then determine its position in space (left - right, bottom - above, central - third, etc.), the perspective of looking at it (frog-, bird’s-eye view…), and its relationship and attitude in relation to other motifs.
When framing, we use a lens to capture a wider or narrower angle of view.
With an upright or landscape-facing camera in hand, we select the photo format (portrait-portrait, landscape-landscape).
One of the compositional elements is also the arrangement and relationship between the light and dark parts of the photograph. Also important is the color composition, which depends on the distribution and relationship between different colors or color groups (cold, warm colors).
We create a sense of depth representation with the help of lines, overlapping objects, size relationships, depth of field, etc.
Other ways to build a good composition are: symmetries, shadows and reflections, internal framing, sensible use of empty space, etc.
- Genres of photography
Today, it seems almost impossible to name all the types and genres of photography. Indeed, genres can be divided according to various criteria such as: type of photographic medium, techniques, methods, purposes, motifs, etc. We differentiate between:
- Digital and analogue photography,
- Color and B&W photography,
- Artistic, commercial, photojournalistic, scientific, military, casual, etc. photography,
- Creative photography and photography with a fixed photographic format,
- Edited and unedited photography,
- Studio, street, underwater, "drone" photography,
- Portrait, landscape, architectural, still life, nature (…) photography.
- Photographic expression
No photograph is merely a "frozen" image of objective reality, but also always a carrier or mediator of subjective interpretations, ideas, stories, emotions, thinking, communication, imagination, etc.
Photographic expression allows for and encourages several different things. Most common of them it is the depiction of persons (portraits) with their facial expressions, hand gestures, posture, clothing, interpersonal relationships, etc.
We photograph different motifs that, in turn, symbolize different things in human cultures (e.g. road, house, stairs, tree, different plants, animals, sun, fire, ice, cloud, cross, knot…).
Notions such as light, color and sharpness all carry certain meanings; the same is true for spatial dimensions such as left, right, bottom, top, middle.
Expressiveness in photography is emphasized by contrasts and opposites between different motifs or artistic elements (near - far, small - large, fast - slow, black - white, simple - complex), and sometimes also by the similarities and contact points shown in the photograph.
The abstractness of an image, no matter how great it is in scope, can help the viewer to incorporate his or her own subjective interpretation into the photograph.
The photos with the strongest story are often said to be unique and to have been taken at just the right, decisive moment.
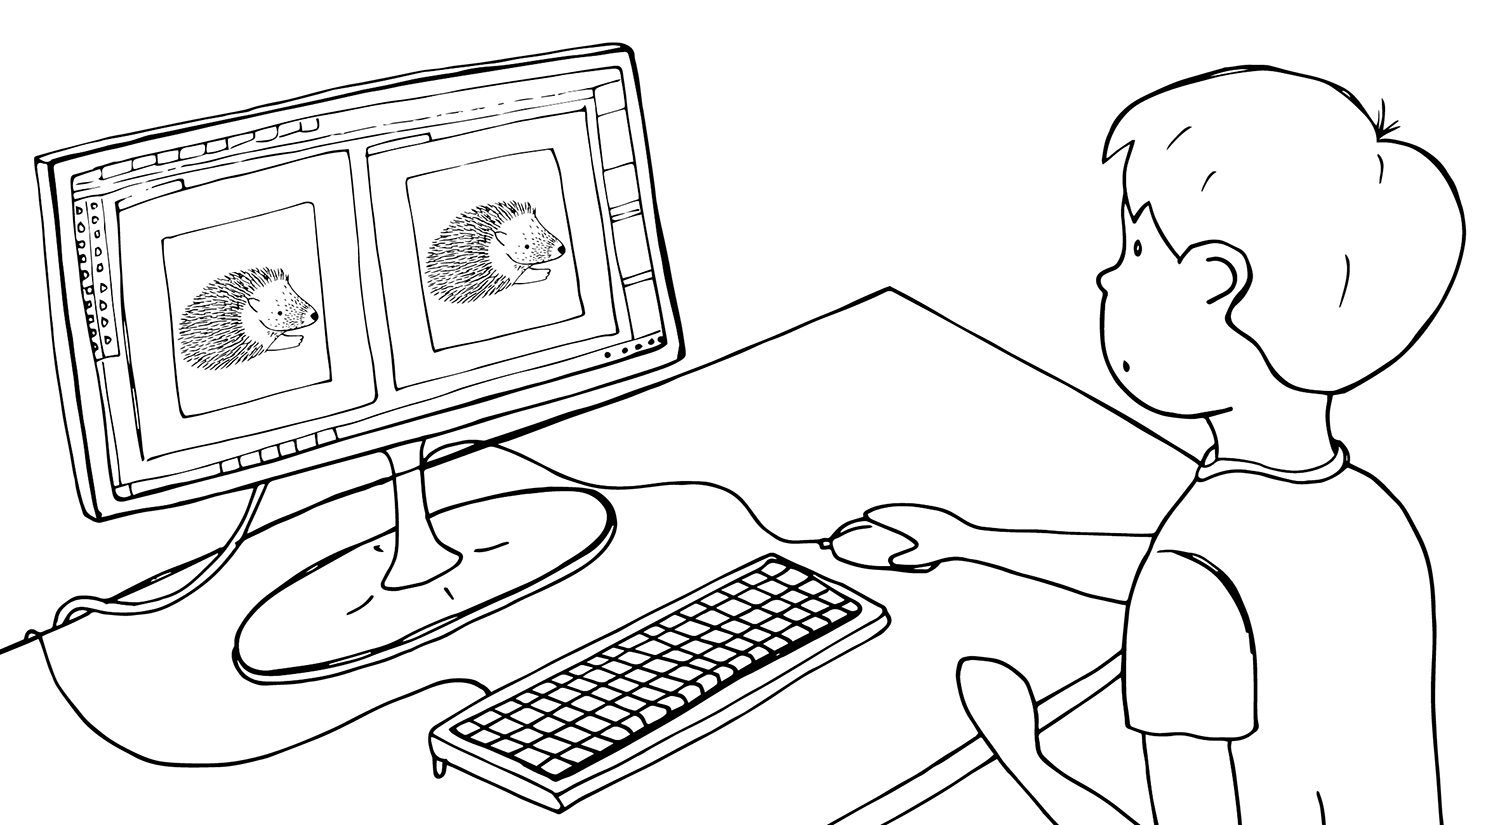
- Transferring and saving photographs to a computer
Further necessary steps and creative procedures, in which the children themselves must actively participate, can prove to be just as fun as taking pictures.
The first thing we do after a photo session is to transfer the photos to a computer, on which we organized meaningful structure and named our files beforehand. This is important because it will later let us find more easily what we are looking for in the multitudes of photographs.
We carefully review all the photos, as the large-screen display permits us to see details we might have previously missed. After the review, we make a selection and decide which photos should be deleted and which are suitable for further processing, printing, publication, etc.
We always make sure to back up and store data on other media as well.
- Processing photographs with a computer program
Depending on our and the child's computer skills, we select and use a suitable and accessible computer program for editing and processing photos.
For a project with children of this type, it is enough to use some basic creative functions such as: crop, light and color correction, resizing the image for the purpose of publishing on the Internet, sending by e-mail or press.
- Presentation of photographs
The creative process, in which children once again get actively involved, continues with the reflection and presentation of one or more photographs. If there are more photos, we can group them together into a collection, series, or collage.
Photographs can be presented in the form of video projections, printed exhibitions, photo books, publications on the Internet / social networks, e-mails, etc.
When presenting photographs, we pay attention to the rights of all the subjects involved, respecting and protecting their privacy.
We can also encourage children to name the selected photos. A title that doesn’t just describe the contents of the photo can upgrade said photo and represent an additional creative element.
- Engaging the spectator
The creative process should also include viewers, who can – through their comments, suggestions, reflections and praise – make an important contribution to reinforcing children's positive self-image and motivation for further progress.
An adult should moderate conversations that take place in an educational group or in a family.
Viewers' responses to the displayed photos can also be obtained with the help of social networks, a book of impressions present at the printed exhibition, e-mails, etc.